Problems with Samsung Series 5 Ultrabook and USBTinyISP

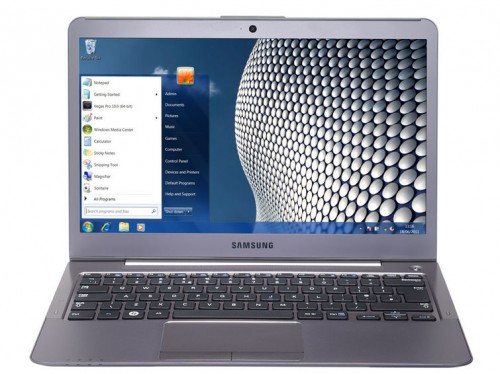
Well, this is somewhat disappointing… I recently acquired a Samsung Series 5 530U3B Ultrabook which is really nice and was going to make my main laptop for on the work on the go. Unfortunately it supplies insufficient power to my USBTinyISP programmer. The effect is that when I try to program ATTiny45, I get this error:

Binary sketch size: 2,752 bytes (of a 4,096 byte maximum)
avrdude: verification error, first mismatch at byte 0x0040
 0x02 != 0x36
avrdude: verification error; content mismatch

The verification fails on random memory addresses. This means that I will need to add an external power supply to my custom programmer or find a USB hub with external power supply. I think that the latter will be the easiest.

A world of free IC samples

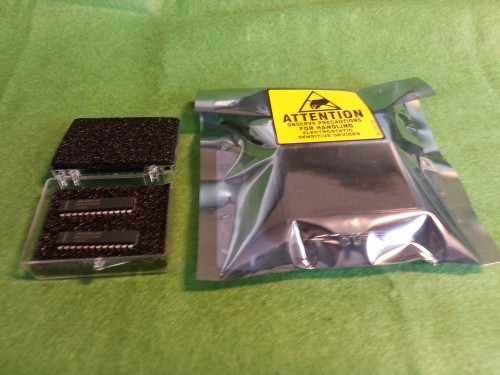
The world is full of free integrated circuit samples, you just need to know where to look for them. Today I got a very nicely packaged batch of samples from Maxim Integrated. All I had to do was ask nicely :)

I filled all relevant information four days ago and today I have 2 x MAX7219CNG and 2 x MAX7221CNG LED display drivers. They retail at about £8 and £13 without shipping so it’s about £42 of free stuff! Will be using them to control 8×8 LED matrices I got a while back from Rapid Online.

Thanks Maxim Integrated!

Using USBTinyISP to program ATTiny45 and ATTiny85

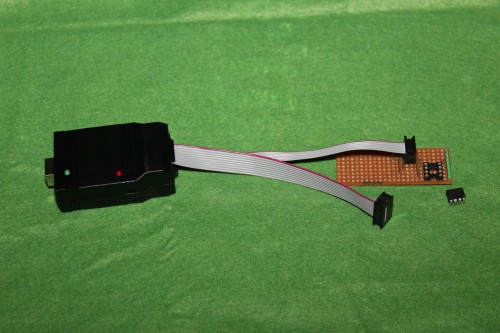
There are a few different ways how to program ATTiny microcontrollers – lovely little chip with so much potential. I tried programming with Arduino Uno, but the solution was too clumsy with lots of wires connected to the breadboard from Arduino. Then I remembered that I have USBTinyISP and apparently it is one of the best ways to program these chips.

Continue reading “Using USBTinyISP to program ATTiny45 and ATTiny85”

Arduino touch sensor ky036

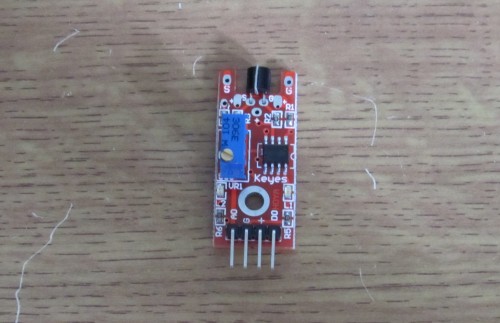
I received a few Arduino touch sensors from DealExtreme just because they were dirty cheap and I have a few ideas where I could use them as device power switches. There is probably an easier way to build a touch sensor for Arduino without that many additional components, but let’s see what we can do with this cheap sensor for just $2.6 or less than £1.7.

Continue reading “Arduino touch sensor ky036”

Fixing a Seagate 7200.11 hard drive with Arduino

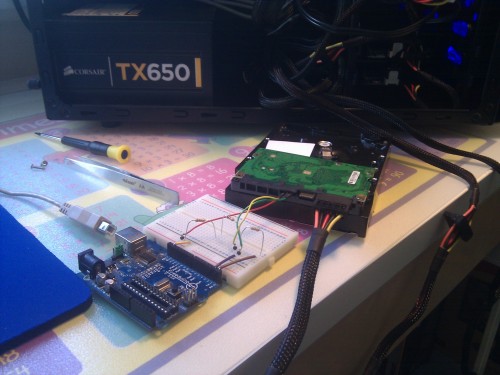
I received a Seagate 7200.11 hard disk in a BSY (busy) state. The hard disk drive spins, but it’s completely invisible to the BIOS. Apparently all these models are affected by a bug in the drive’s firmware: ST31000340AS, ST3500320AS, ST3750330AS and others too.

I found this very well written guide on how to fix the BSY state on Seagate 7200.11 drive. I needed some sort of serial TTL adapter to hook up to the drive’s serial port, but didn’t have one at hand. Then I remembered that I have an Arduino clone Freeduino lying around and I knew that it already has a FTDI chip that does the USB to serial conversion for the Atmega chip. Ok, so it’s not technically Arduino AVR chip used to fix the drive, just the board.

Continue reading “Fixing a Seagate 7200.11 hard drive with Arduino”

Arduino interfacing SRF05 rage finder with LCD screen

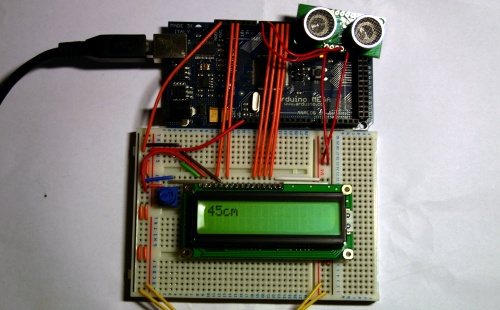
This is a another sample demonstrating Arduino MEGA, LCD screen and SRF05 ultrasonic range finder. The distance measurement from SRF05 is displayed on the LCD screen in centimetres.

Different from Infra Red range finder witch uses IR light to measure distance, ultrasonic range finder sends short high pitch sound pulses and measures the time for the echo to come back to the microphone. Here is a very good comparison of the two types of range finders. The code running on the Arduino:

// include the library code:
#include <LiquidCrystal.h>

#define echoPin 6             // the SRF05's echo pin
#define initPin 7             // the SRF05's init pin
unsigned long pulseTime = 0;  // variable for reading the pulse

// initialize the library with the numbers of the interface pins
LiquidCrystal lcd(12, 11, 5, 4, 3, 2);

void setup() {
 // set up the LCD's number of rows and columns:
 lcd.begin(16, 2);

 // make the init pin an output:
 pinMode(initPin, OUTPUT);
 // make the echo pin an input:
 pinMode(echoPin, INPUT);
}

void loop() {
 digitalWrite(initPin, HIGH);
 delayMicroseconds(10);
 digitalWrite(initPin, LOW);

 pulseTime = pulseIn(echoPin, HIGH);

 lcd.setCursor(0,0);
 lcd.print(pulseTime / 58, DEC);
 lcd.print("cm");

 delay(100);
 lcd.clear();
}

Another application for SRF05 is a basic theremin by LuckyLarry. You can see it in action here:

A Basic theremin Piano theremin

Read on here:

Arduino MEGA auto-reset fix

The Arduino MEGA I got had and issue with automatic reset during sketch upload. The error message in the Arduino IDE looked something like this:

<pre>avrdude: stk500_getsync(): not in sync: resp=0x00
avrdude: stk500_disable(): protocol error, expect=0x14, resp=0x51

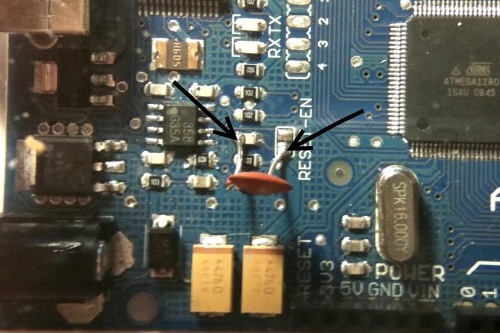
I had to hit Reset button just before uploading a sketch. This issue was due to some sort of defect in the Reset capacitor. The fix is very simple: just solder a 100nF capacitor on top of the defect one.

(via)

Arduino LED traffic lights

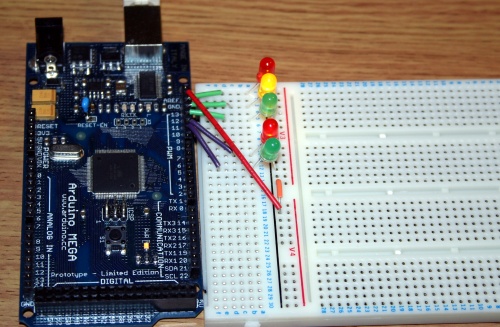
This is a bit enhanced version of the “hello world” blink application for Arduino: traffic lights emulator. The top three LEDs control car traffic and the bottom two are fore pedestrians.

int carRedPin =  13;
int carYellowPin =  12;
int carGreenPin =  11;
int pedestrianRedPin =  10;
int pedestrianGreenPin =  9;

// The setup() method runs once, when the sketch starts

void setup()   {
  pinMode(carRedPin, OUTPUT);
  pinMode(carYellowPin, OUTPUT);
  pinMode(carGreenPin, OUTPUT);
  pinMode(pedestrianRedPin, OUTPUT);
  pinMode(pedestrianGreenPin, OUTPUT);
}

// the loop() method runs over and over again,
// as long as the Arduino has power

void blink(int light)
{
  digitalWrite(light, LOW);
  delay(500);
  digitalWrite(light, HIGH);
  delay(500);
  digitalWrite(light, LOW);
  delay(500);
  digitalWrite(light, HIGH);
  delay(500);
  digitalWrite(light, LOW);
  delay(500);
  digitalWrite(light, HIGH);
  delay(500);
  digitalWrite(light, LOW);
}

void loop()
{
  digitalWrite(carRedPin, HIGH);
  digitalWrite(pedestrianGreenPin, HIGH);
  delay(3000);

  blink(pedestrianGreenPin);

  digitalWrite(pedestrianRedPin, HIGH);
  digitalWrite(pedestrianGreenPin, LOW);
  delay(1000);
  digitalWrite(carYellowPin, HIGH);
  delay(1000);
  digitalWrite(carRedPin, LOW);
  digitalWrite(carYellowPin, LOW);
  digitalWrite(carGreenPin, HIGH);
  delay(3000);

  blink(carGreenPin);

  digitalWrite(carYellowPin, HIGH);
  delay(2000);
  digitalWrite(carYellowPin, LOW);
  digitalWrite(carRedPin, HIGH);
  delay(1000);
  digitalWrite(pedestrianRedPin, LOW);
}

The code above is straightforward: just enabling and disabling LED at certain time. Traffic lights in action:

Arduino and LCD screen

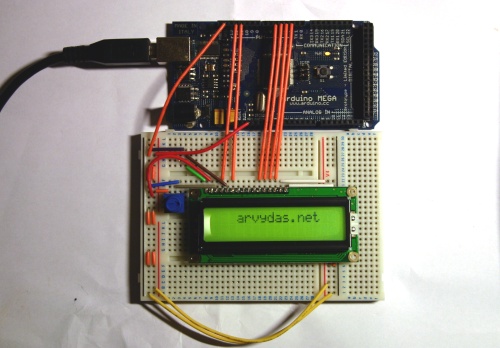
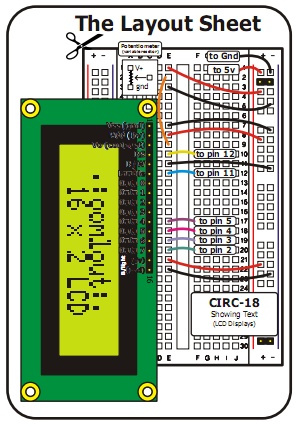
This was one of my first projects to try out various features of Arduino. I got this 2×16 LCD screen from Oomlout. The breadboard schematics came together with the LCD screen and is relatively simple.

Here is the sample code I uploaded to the controller:

// include the library code:
#include <LiquidCrystal.h>

// initialize the library with the numbers of the interface pins
LiquidCrystal lcd(12, 11, 5, 4, 3, 2);

void setup() {
 // set up the LCD's number of rows and columns:
 lcd.begin(16, 2);
}

void loop() {

 lcd.print("                 arvydas.net");

 lcd.setCursor(16,1);
 lcd.autoscroll();

 for (int thisChar = 0; thisChar &lt; 28; thisChar++) {
 lcd.print(" ");
 delay(250);
 }
 lcd.noAutoscroll();

 lcd.clear();
}

Just a simple scrolling text and here is the video:

Hacking a toy car @ fizzPOP Howduino

IMG1716

This Saturday I had a chance to attend a fantastic Howduino event in Birmingham – a one day hackers workshop. This was my first experience in this type of event, so I came without any expectations. :) Once the the welcoming announcements were made everybody started hacking either by going to beginners workshops or working on their own projects. Steward from Kre8 joined me at my desk and we had a lot of fun working together.

The task

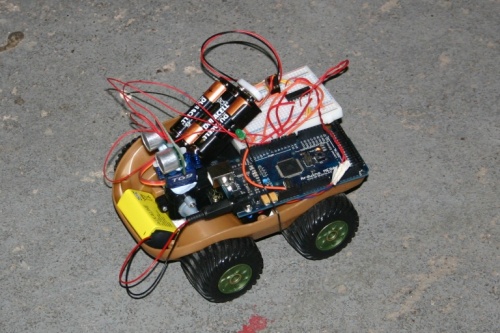
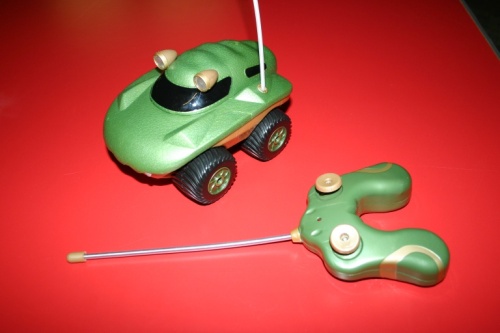
My task for the day was to transform this R/C toy car from ELC into an obstacle avoiding robot.

IMG1710

I chose this cute little toy, because each side of the wheels is controlled by a separate motor. This allows the car to turn around 360 degrees in one spot. There was one big challenge involved in hacking this toy car: I had to be able to assemble it back again, because my son had already announced the ownership. :) Continue reading “Hacking a toy car @ fizzPOP Howduino”