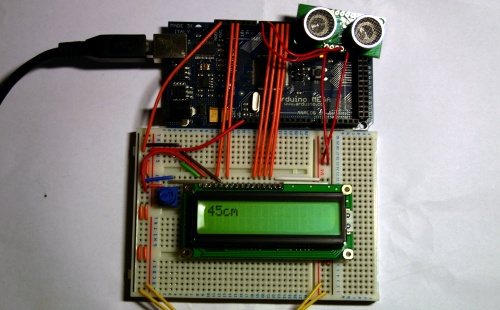
Arduino interfacing SRF05 rage finder with LCD screen

This is a another sample demonstrating Arduino MEGA, LCD screen and SRF05 ultrasonic range finder. The distance measurement from SRF05 is displayed on the LCD screen in centimetres.

Different from Infra Red range finder witch uses IR light to measure distance, ultrasonic range finder sends short high pitch sound pulses and measures the time for the echo to come back to the microphone. Here is a very good comparison of the two types of range finders. The code running on the Arduino:

// include the library code:
#include <LiquidCrystal.h>

#define echoPin 6             // the SRF05's echo pin
#define initPin 7             // the SRF05's init pin
unsigned long pulseTime = 0;  // variable for reading the pulse

// initialize the library with the numbers of the interface pins
LiquidCrystal lcd(12, 11, 5, 4, 3, 2);

void setup() {
 // set up the LCD's number of rows and columns:
 lcd.begin(16, 2);

 // make the init pin an output:
 pinMode(initPin, OUTPUT);
 // make the echo pin an input:
 pinMode(echoPin, INPUT);
}

void loop() {
 digitalWrite(initPin, HIGH);
 delayMicroseconds(10);
 digitalWrite(initPin, LOW);

 pulseTime = pulseIn(echoPin, HIGH);

 lcd.setCursor(0,0);
 lcd.print(pulseTime / 58, DEC);
 lcd.print("cm");

 delay(100);
 lcd.clear();
}

Another application for SRF05 is a basic theremin by LuckyLarry. You can see it in action here:

A Basic theremin Piano theremin

Read on here:

Arduino LED traffic lights

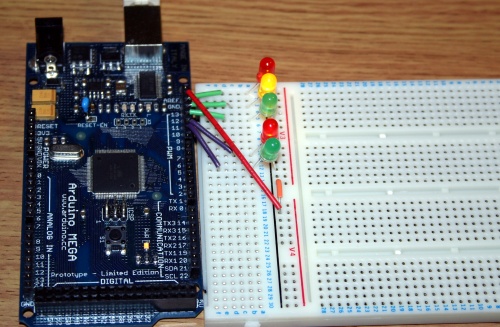
This is a bit enhanced version of the “hello world” blink application for Arduino: traffic lights emulator. The top three LEDs control car traffic and the bottom two are fore pedestrians.

int carRedPin =  13;
int carYellowPin =  12;
int carGreenPin =  11;
int pedestrianRedPin =  10;
int pedestrianGreenPin =  9;

// The setup() method runs once, when the sketch starts

void setup()   {
  pinMode(carRedPin, OUTPUT);
  pinMode(carYellowPin, OUTPUT);
  pinMode(carGreenPin, OUTPUT);
  pinMode(pedestrianRedPin, OUTPUT);
  pinMode(pedestrianGreenPin, OUTPUT);
}

// the loop() method runs over and over again,
// as long as the Arduino has power

void blink(int light)
{
  digitalWrite(light, LOW);
  delay(500);
  digitalWrite(light, HIGH);
  delay(500);
  digitalWrite(light, LOW);
  delay(500);
  digitalWrite(light, HIGH);
  delay(500);
  digitalWrite(light, LOW);
  delay(500);
  digitalWrite(light, HIGH);
  delay(500);
  digitalWrite(light, LOW);
}

void loop()
{
  digitalWrite(carRedPin, HIGH);
  digitalWrite(pedestrianGreenPin, HIGH);
  delay(3000);

  blink(pedestrianGreenPin);

  digitalWrite(pedestrianRedPin, HIGH);
  digitalWrite(pedestrianGreenPin, LOW);
  delay(1000);
  digitalWrite(carYellowPin, HIGH);
  delay(1000);
  digitalWrite(carRedPin, LOW);
  digitalWrite(carYellowPin, LOW);
  digitalWrite(carGreenPin, HIGH);
  delay(3000);

  blink(carGreenPin);

  digitalWrite(carYellowPin, HIGH);
  delay(2000);
  digitalWrite(carYellowPin, LOW);
  digitalWrite(carRedPin, HIGH);
  delay(1000);
  digitalWrite(pedestrianRedPin, LOW);
}

The code above is straightforward: just enabling and disabling LED at certain time. Traffic lights in action: