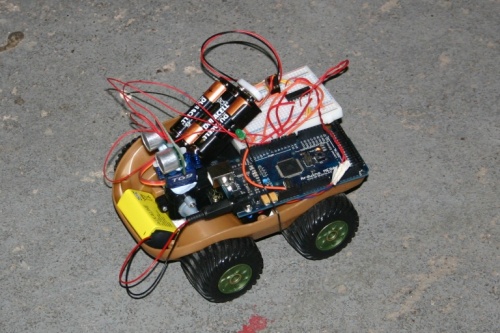
This Saturday I had a chance to attend a fantastic Howduino event in Birmingham – a one day hackers workshop. This was my first experience in this type of event, so I came without any expectations. :) Once the the welcoming announcements were made everybody started hacking either by going to beginners workshops or working on their own projects. Steward from Kre8 joined me at my desk and we had a lot of fun working together.
The task
My task for the day was to transform this R/C toy car from ELC into an obstacle avoiding robot.
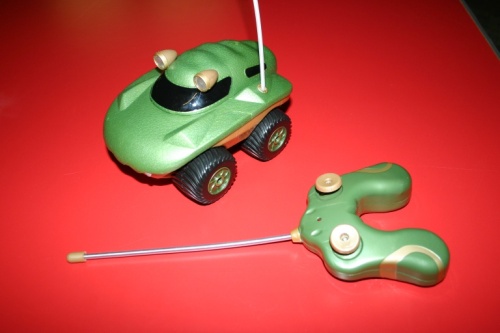
I chose this cute little toy, because each side of the wheels is controlled by a separate motor. This allows the car to turn around 360 degrees in one spot. There was one big challenge involved in hacking this toy car: I had to be able to assemble it back again, because my son had already announced the ownership. :)
Let the hacking begin!
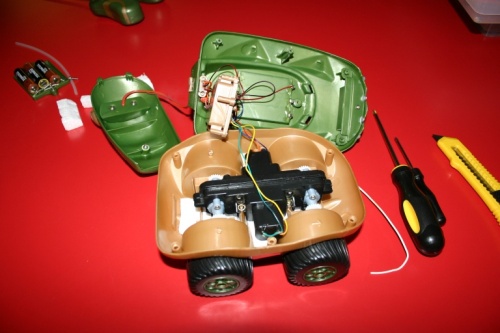
Above is the picture of the disassembled car. The quality of the toy is really high, because it is supposed to sustain driving in the mud and water. You can see the wires coming from the two motors on each side of the chassis. Those were cut roughly in the middle and extended with additional wires.
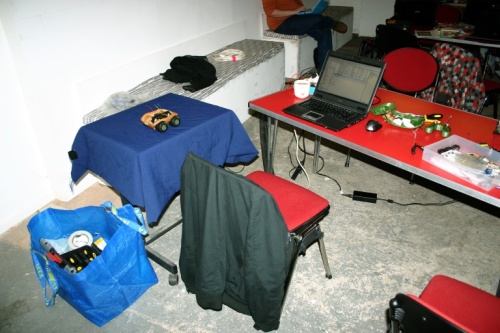
A quick break: above is the picture of my work desk @ Howduino. The only thing that bothered in the event was very poor lighting. Despite that it was great to have so many like-minded hackers around sharing ideas and hardware with each other.
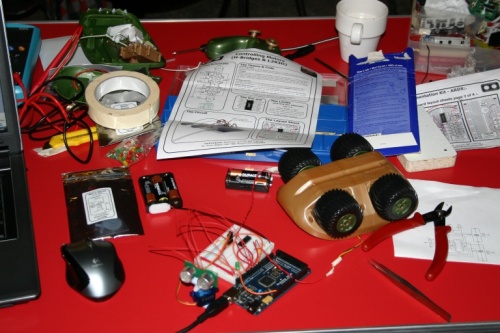
Here you can see the prototype spread on the table: the chassis upside down so it doesn’t dive off the desk together with all electronic parts, breadboard with L293D motor driver, Arduino MEGA, SRF05 ultrasonic range finder on top of a servo. I couldn’t manage to use the servo for advanced range finding, because it would have complicated the software and I wouldn’t have finished the project on time.
The code
I grabbed the essential part of the code from LuckyLarry’s Obstacle avoidance robot and tested it.
const int numOfReadings = 10;           // number of readings to take/ items in the array
int readings[numOfReadings];            // stores the distance readings in an array
int arrayIndex = 0;                     // arrayIndex of the current item in the array
int total = 0;                          // stores the cumlative total
int averageDistance = 0;                // stores the average value
unsigned long distance = 0;

const int motor1Pin1 = 2;    // H-bridge leg 1
const int motor1Pin2 = 3;    // H-bridge leg 2
const int motor2Pin1 = 4;    // H-bridge leg 3
const int motor2Pin2 = 5;    // H-bridge leg 4
const int enable1Pin = 9;    // H-bridge enable pin
const int enable2Pin = 10;   // H-bridge enable pin
const int ledPin = 13;       // LED

#define echoPin 6             // the SRF04's echo pin
#define initPin 7             // the SRF04's init pin
unsigned long pulseTime = 0;  // variable for reading the pulse
long servoAngle = 90;         // variable for reading the pulse
int servoDirection = 1;

void setup() {
  pinMode(ledPin, OUTPUT);

  // set all the other pins you're using as outputs:
  pinMode(motor1Pin1, OUTPUT);
  pinMode(motor1Pin2, OUTPUT);
  pinMode(enable1Pin, OUTPUT);

  pinMode(motor2Pin1, OUTPUT);
  pinMode(motor2Pin2, OUTPUT);
  pinMode(enable2Pin, OUTPUT);

  // set enablePin high so that motor can turn on:
  digitalWrite(enable1Pin, HIGH);
  digitalWrite(enable2Pin, HIGH);

  // make the init pin an output:
  pinMode(initPin, OUTPUT);
  // make the echo pin an input:
  pinMode(echoPin, INPUT);

  for (int thisReading = 0; thisReading < numOfReadings; thisReading++)
  {
    readings[thisReading] = 0;
  }

  // blink the LED 3 times. This should happen only once.
  // if you see the LED blink three times, it means that the module
  // reset itself,. probably because the motor caused a brownout
  // or a short.
  blink(ledPin, 3, 100);
}

void loop() {
  digitalWrite(initPin, HIGH);              // send 10 microsecond pulse
  delayMicroseconds(10);                    // wait 10 microseconds before turning off
  digitalWrite(initPin, LOW);               // stop sending the pulse
  pulseTime = pulseIn(echoPin, HIGH);       // Look for a return pulse, it should be high as the pulse goes low-high-low
  distance = pulseTime/58;                  // Distance = pulse time / 58 to convert to cm.
  total= total - readings[arrayIndex];      // subtract the last distance
  readings[arrayIndex] = distance;          // add distance reading to array
  total= total + readings[arrayIndex];      // add the reading to the total
  arrayIndex = arrayIndex + 1;              // go to the next item in the array

  // At the end of the array (10 items) then start again
  if (arrayIndex >= numOfReadings)  {
    arrayIndex = 0;
  }

  averageDistance = total / numOfReadings;      // calculate the average distance
  delay(10);

  // check the average distance and move accordingly

  if (averageDistance < = 20){
    // go backwards
    digitalWrite(motor1Pin1, HIGH);
    digitalWrite(motor1Pin2, LOW);
    digitalWrite(motor2Pin1, HIGH);
    digitalWrite(motor2Pin2, LOW);

  }

  if (averageDistance <= 60 && averageDistance > 20) {
    // turn
    digitalWrite(motor1Pin1, HIGH);
    digitalWrite(motor1Pin2, LOW);
    digitalWrite(motor2Pin1, LOW);
    digitalWrite(motor2Pin2, LOW);
  }

  if (averageDistance > 60)   {
    // go forward
    digitalWrite(motor1Pin1, LOW);
    digitalWrite(motor1Pin2, HIGH);
    digitalWrite(motor2Pin1, LOW);
    digitalWrite(motor2Pin2, HIGH);

  }

}

/*
blinks an LED
*/
void blink(int whatPin, int howManyTimes, int milliSecs) {
  int i = 0;
  for ( i = 0; i < howManyTimes; i++) {
    digitalWrite(whatPin, HIGH);
    delay(milliSecs/2);
    digitalWrite(whatPin, LOW);
    delay(milliSecs/2);
  }
}
The code above keeps checking the distance to the closest object and calculates the average. If distance is more than 60cm, robot runs forward, when distance is between 20cm and 60cm robot turns left. When distance is less than 20cm, robot runs back.
Mission accomplished!
Tested and working! Final assembly on the desk:
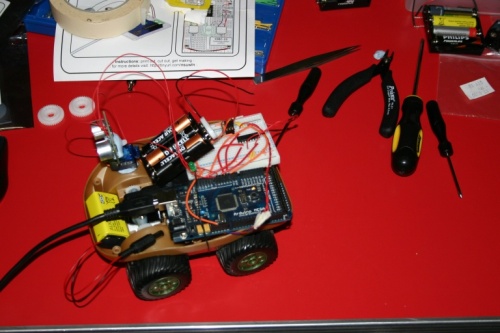
You can see the little car running on the floor :)
[flickrvideo]http://www.flickr.com/photos/nikki_pugh/4124443040[/flickrvideo]
Thanks to Nikki for this video!
What’s next?
There is still a lot to do:
- Use the servo to move the range finder for better “view” of the objects around;
- Resolve battery drain, because quickly switching the direction of the motor is not good;
- Make it a bit smarter to stop and look around;
- Investigate surrounding area and draw a map in the memory;
- Try to find docking station to recharge all by itself;
- Make it light loving/phobic;
You can find more pictures from the event in the Howduino Flickr group and a blog post. Big thank you goes to fizzPOP for organizing the even and hope to see all of you next year!
Heh cool, glad you found a use for my code.
Though my averaging is out – it averages over 10 iterations of the void loop, instead a better wy of doing it is as follows:
    for (index = 0; index<=numReadings;index++) {
      digitalWrite(initPin, LOW);
      delayMicroseconds(50);
      digitalWrite(initPin, HIGH);
      delayMicroseconds(50);
      digitalWrite(initPin, LOW);
      pulseTime = pulseIn(echoPin, HIGH);
      distance = pulseTime/58;
      total = total + distance;
      delay(10);
    }
    average = total/numReadings;
    if (index >= numReadings)  {
      index = 0;
      total = 0;
    }
Basically it uses the same variables at the top of the script but actually calculates an average takign 10 readings at a time before deciding.
I’ve rigged up the SRF05 to a pair of servos, what I’d like to work on is mapping, so thebot maps its area and decides based on what its seen – then save and reuse the map (I’m a long way off!)
Larry, try using pre tag for your code. I’ll fix your comment once you post correct code :)
Hehe mapping is one of my tasks too!
Edit: you can try using “[ cpp ]” and “[/ cpp ]” without quotes and spaces. Should format the code pretty :). I’ll definatelly have this somewhere below the comment box.
This cool I have the same car with Infrared only found a code that goes with my controller 9110S downloaded program but only cycles one way ? I want to use a tv remote but no code for that would any IR code work ?